BitLocker is one of the easiest ways to protect data on Windows machines — especially in a company or school where laptops might get lost or stolen. But if you’ve ever tried to roll it out using just Group Policy (GPO), you probably ran into a common problem: it doesn’t actually turn on BitLocker by itself.
Yep, GPO can configure BitLocker settings, but it won’t flip the switch without some sort of user interaction — which is a pain when you’re managing dozens or hundreds of computers.
I needed a way to automatically enable BitLocker, without user input, and also make sure the recovery keys were safely backed up to Active Directory (AD). So, i wrote a simple script that takes care of all that — and I run it using Task Scheduler.
Let’s break it all down.
What This Setup Does
Here’s what I wanted to achieve:
- Turn on BitLocker automatically (with no user prompts)
- Back up the recovery key to Active Directory
- Handle both new and already-encrypted devices
- Run quietly in the background using Task Scheduler
It sounds like a lot, but with the right GPO settings and a small script, it’s actually pretty straightforward.
Why Not Just Use GPO?
I tried. The problem is, GPO only sets the policies — it doesn’t actually enable encryption on its own. You still need the user to click through the BitLocker wizard, which isn’t ideal in a managed environment.
I have a script solves that problem by:
- Checking if BitLocker is already enabled.
- Enabling it silently if it’s not.
- Uploading the recovery key to AD either way — even if BitLocker was turned on before.
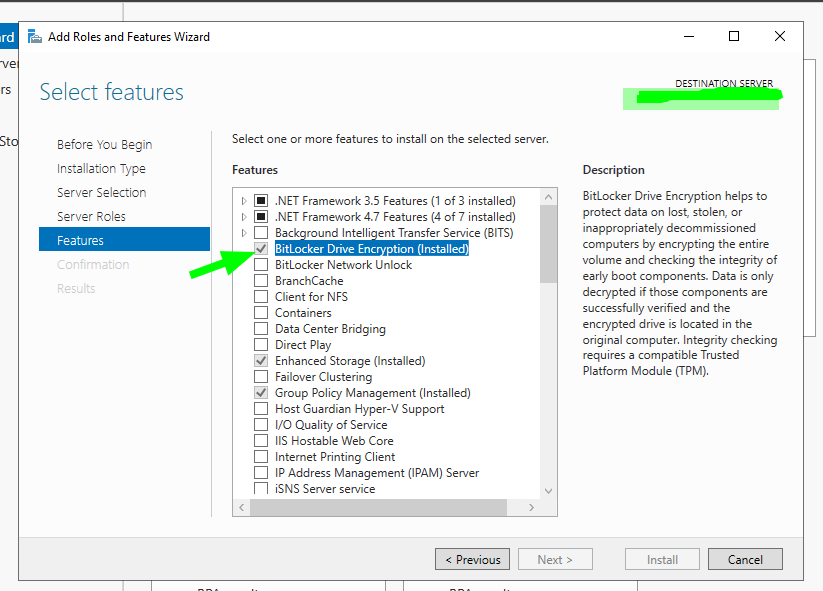
Step 1: Install the BitLocker Feature
Make sure BitLocker is installed on your devices. You can push this via GPO, or run this PowerShell command manually or through a deployment tool:
Enable-WindowsOptionalFeature -Online -FeatureName BitLocker -All
Or enable through Server Manager
Step 2: Set the Right GPOs
Now configure Group Policy so that BitLocker works the way you want and backs up recovery keys to Active Directory automatically.
These are the main GPO settings i used:
GPO Path:
Computer Configuration > Administrative Templates > Windows Components > BitLocker Drive Encryption
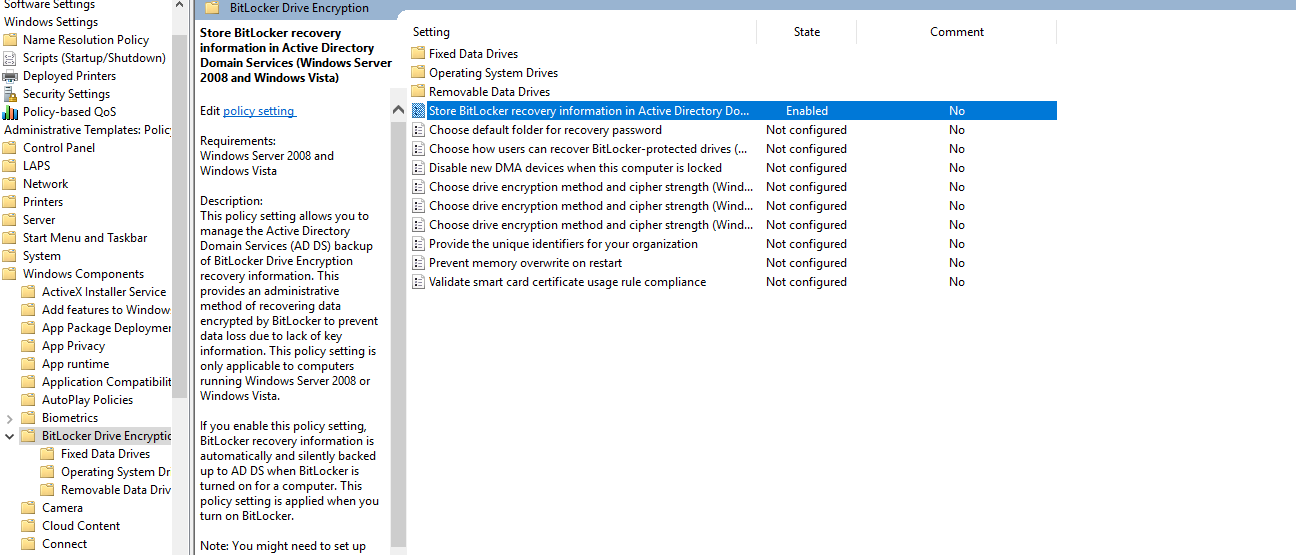
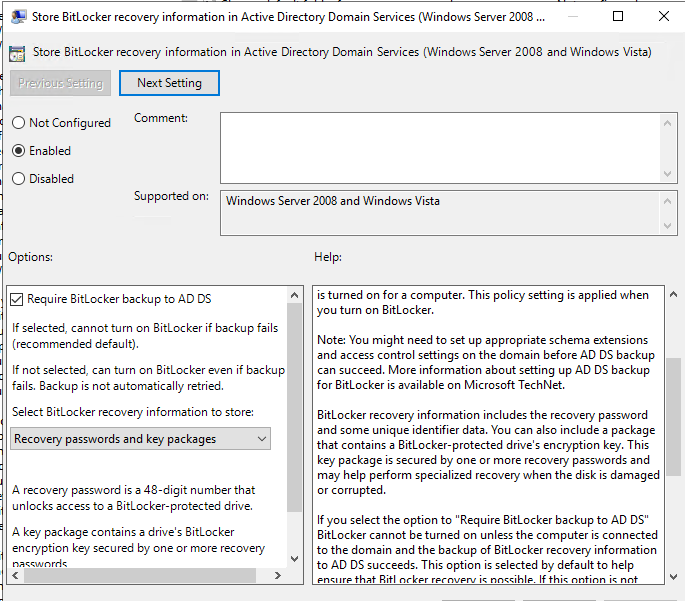
What to do:
- Set to Enabled
- Check:
✅ “Require BitLocker backup to AD DS”
✅ “Select Recivery passwords and key packages in Bitlocker information to store”
🛡 2. Choose how BitLocker-protected operating system drives can be recovered
GPO Path:
Computer Configuration > Administrative Templates > Windows Components > BitLocker Drive Encryption > Operating System Drives
What to do:
- Set to Enabled
- Check both options:
✅ “Save BitLocker recovery information to AD DS for operating system drives”
✅ “Allow data recovery agent”
✅ “Do not enable BitLocker until recovery information is stored in AD DS”
(This ensures that the BitLocker recovery key gets stored in Active Directory before encryption starts.)

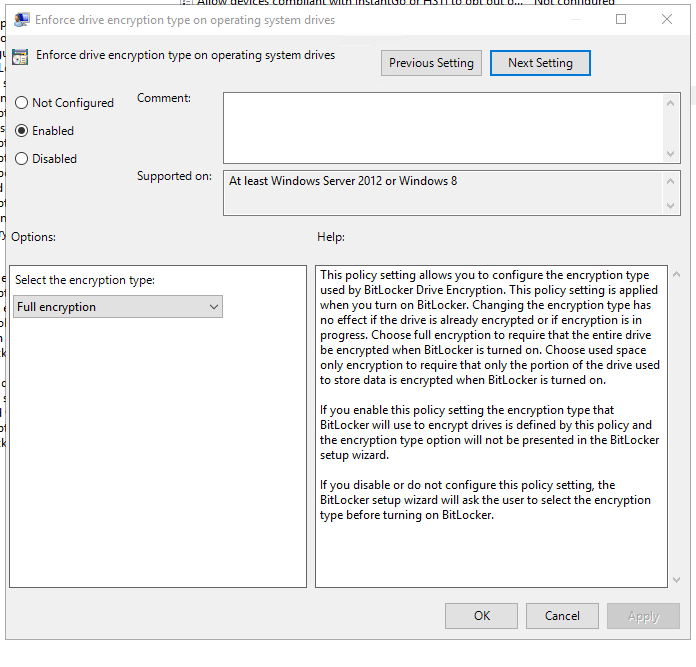
💽 3. Enforce drive encryption type on operating system drives
GPO Path:
Computer Configuration > Administrative Templates > Windows Components > BitLocker Drive Encryption > Operating System Drives
What to do:
- Set to Enabled
- Choose encryption type:
🔐 Full encryption
This makes sure encrypt the whole system drive.
Step 3: Use the Script
This is where the real shit happens. Since GPO can’t turn on BitLocker automatically without user input, I use a simple script to do it silently.
The script does three key things:
- Checks if BitLocker is already enabled
- Enables it if it’s not
- Uploads the recovery key to Active Directory (even if BitLocker was already enabled manually)
🔧 Script Overview
- Runs silently — no user prompts
- Uses TPM for encryption (no PIN or password needed)
- Stores the BitLocker recovery key in Active Directory
- Works for both new and already-encrypted devices
This ensures all machines are encrypted and recovery info is safely stored, no matter how BitLocker was turned on.
📂 Get the Script
👉 You can view or download the script from my GitHub repo:
https://github.com/akamasine/dotfiles-n-tools/blob/main/Windows/bitlocker-key-sync.bat
✅ What You’ll Need
- Save the
.bat file in shared drive which can be access by domain computers.
- Make sure the target machine has TPM support
- Ensure the device is joined to the domain
💡 Tip: Test the script in a virtual lab or on a test device before pushing to all systems.
Step 4: Automate the Script Using Task Scheduler via GPO
To run the BitLocker script automatically on every machine, we deploy a Scheduled Task using Group Policy (GPO). This lets us run the script silently at startup.
🧭 GPO Path
Group Policy Management Console (GPMC):
Computer Configuration > Preferences > Control Panel Settings > Scheduled Tasks
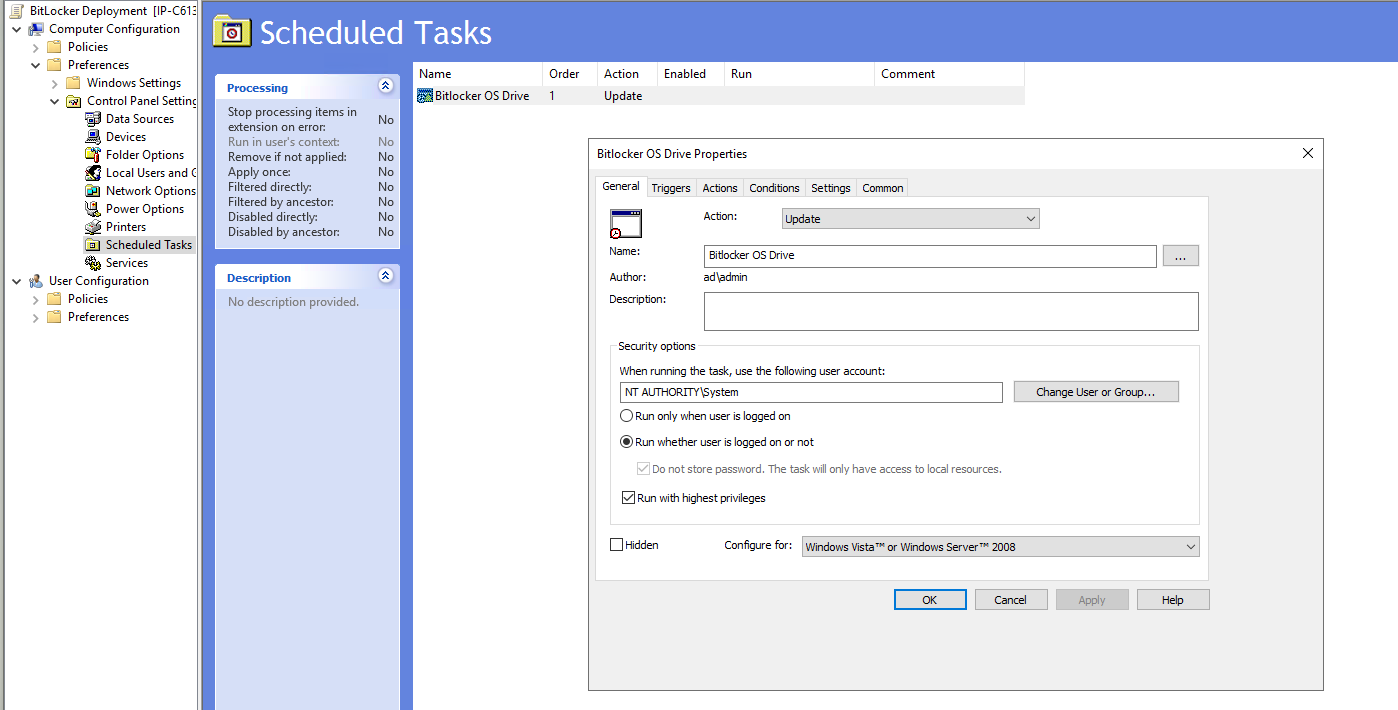
⚙️ Scheduled Task Configuration
Right-click > New > Scheduled Task (At least Windows 7)
Configure as follows:
- General Tab:
- Name:
EnableBitLockerStartup
- Author: Select Domain Admin account
- Run with highest privileges
- User:
SYSTEM
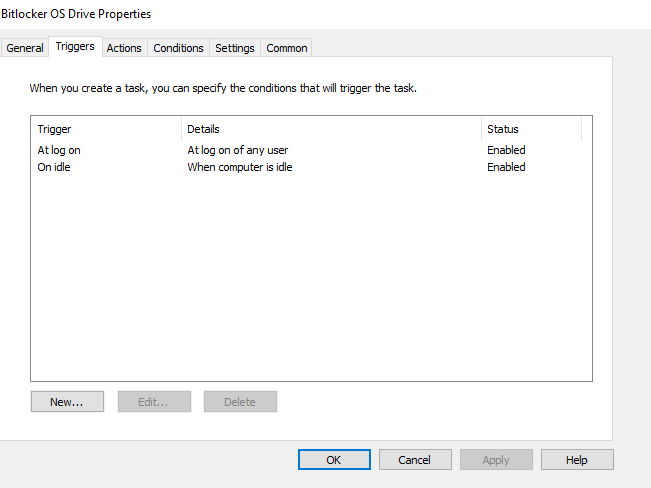
- Triggers Tab:
- Begin the task: At log on
- Begin the task: On idle
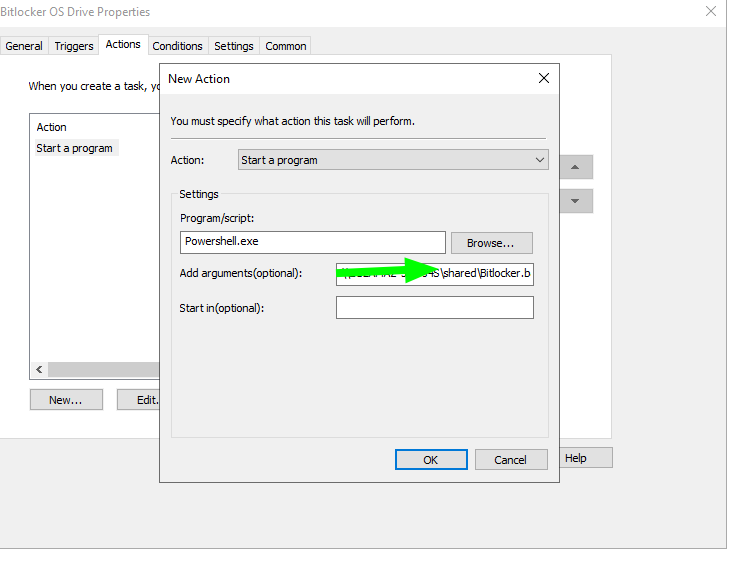
- Actions Tab:
- Start a program:
powershell.exe
- Add arguments: ` “Path\To\Your\Script\enable-bitlocker.bat”`
Step 5: Linking the GPO
After configuring your GPO with the scheduled task and BitLocker settings, you need to link it to the correct Organizational Unit (OU) in Active Directory. This ensures only the intended computers receive the policy.
How to link the GPO:
- Open Group Policy Management Console (GPMC).
- Find the OU containing your target computers (for example,
OU=Workstations).
- Right-click the OU and select Link an Existing GPO.
- Choose your BitLocker GPO from the list and click OK.
💡 Tip: If you have multiple OUs (e.g., for laptops and desktops), link the GPO to each relevant OU as needed.
Verify GPO application:
- On a target machine, run
gpupdate /force and check gpresult /r to confirm the GPO is applied.
- Review the BitLocker status and recovery key backup after the next reboot or logon.
By linking the GPO to the right OU, you ensure that BitLocker is automatically enabled and managed on all required devices, with minimal manual intervention.
Conclusion
With the right GPO settings and a simple automation script, you can silently enable BitLocker and ensure recovery keys are safely stored in Active Directory—no user action required. This approach streamlines device encryption across your organization, reduces manual effort, and keeps your data protected. Test thoroughly, monitor deployment, and enjoy hassle-free BitLocker management!